One Room Challenge: Week 5 Teen Bedroom Progress Notes

Looking for the comment section?


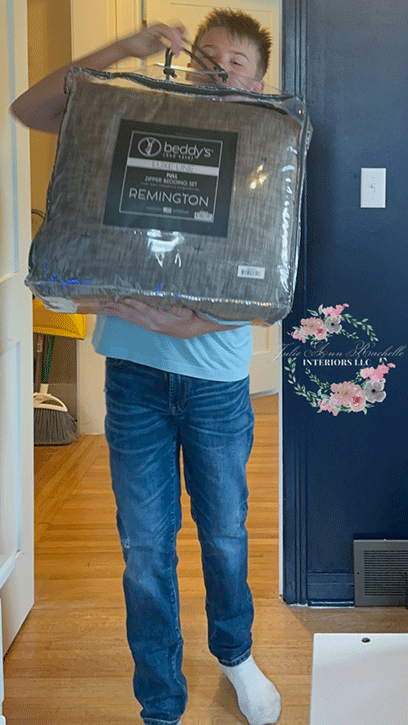
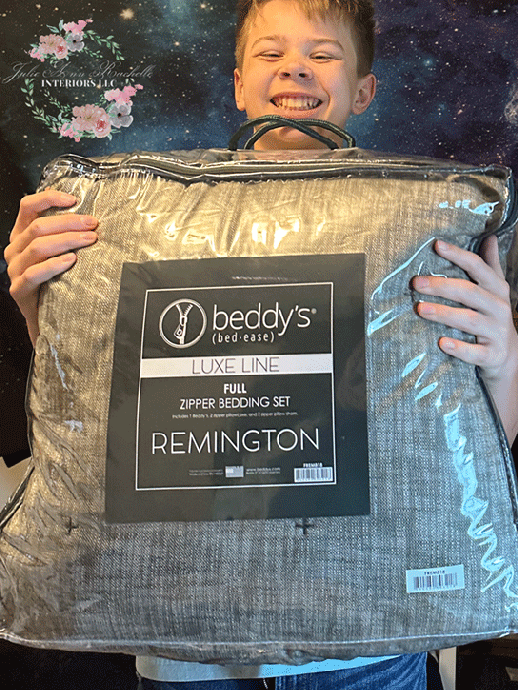
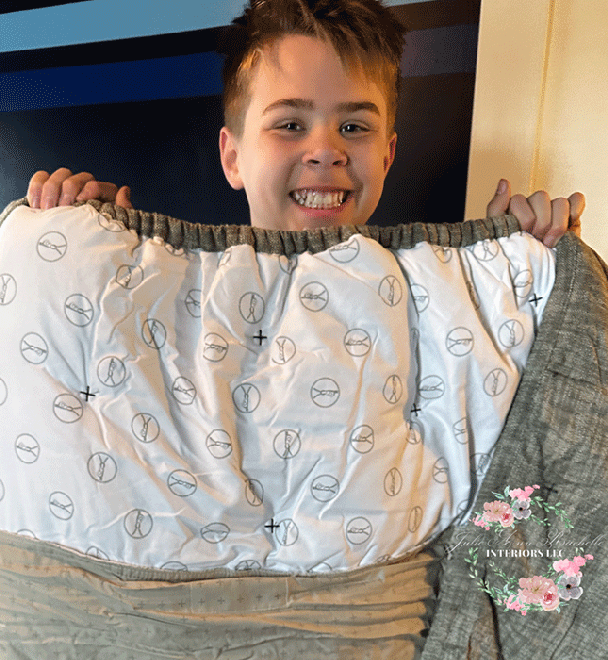
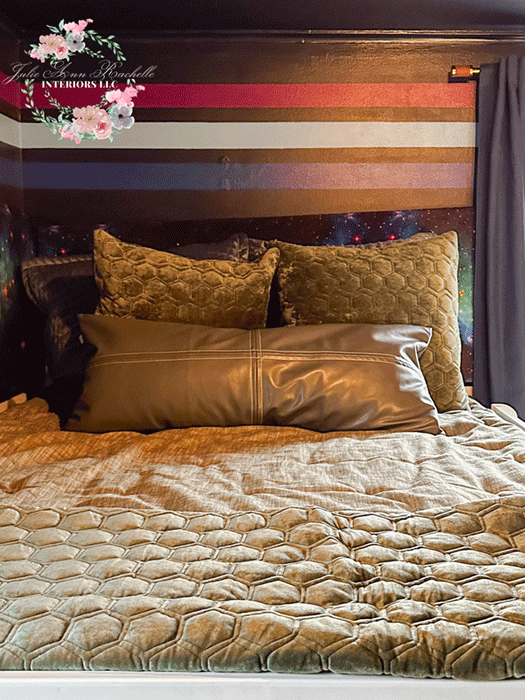
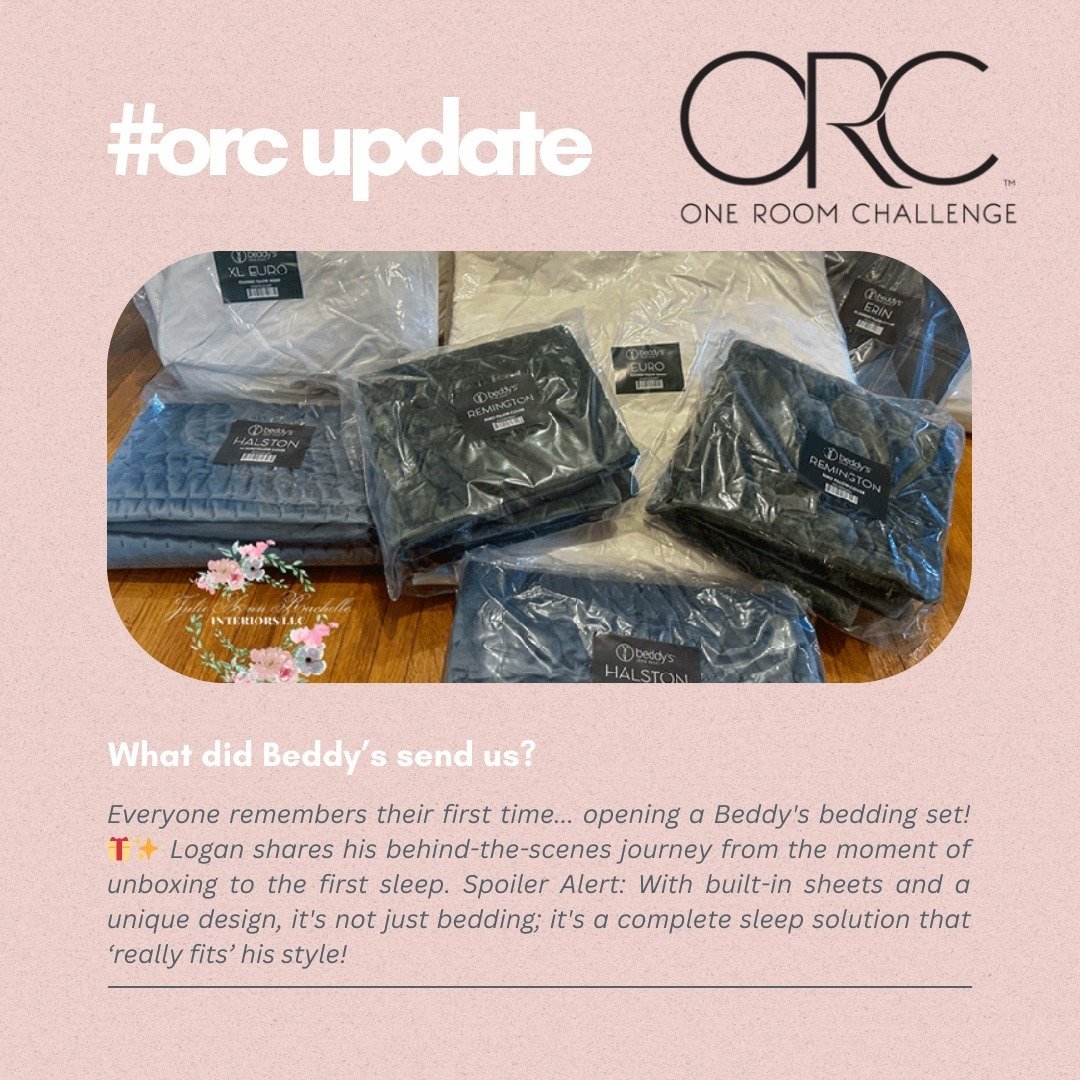
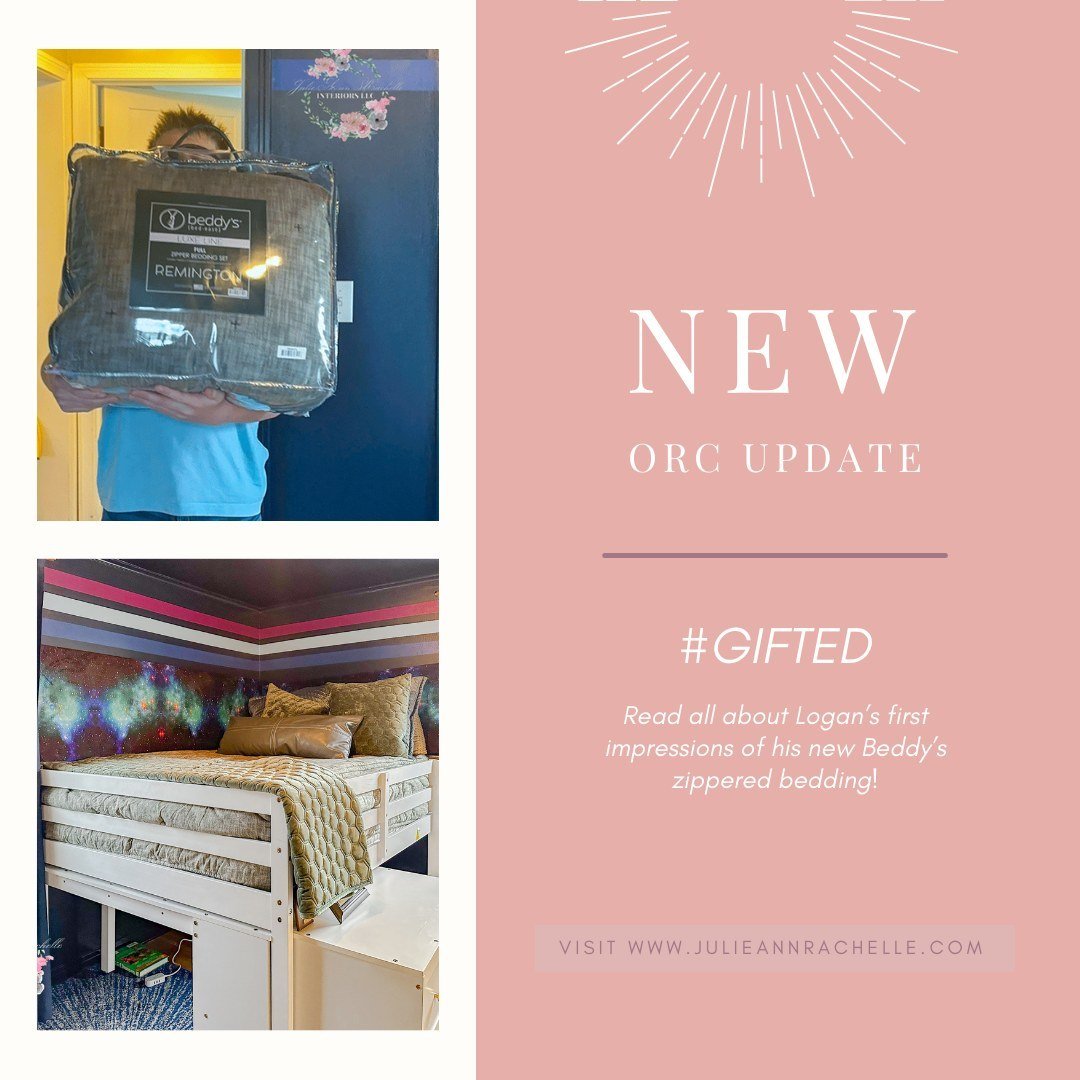
Nephew's MEGAWATT smile says it all! Thanks to Beddys for the awesome gifted zippered bedding - - perfect for busy teens (and quick bed-making!).
P.S. Check out their 10th anniversary sale! Use code BIRTHDAY20 for up to 40% off!
Sponsored by

Loving DesignFiles.co - Huge thanks to DesignFiles.co, my amazing sponsor for #ORC! Love their project management software for designers. (Click the logo to learn more!)
Sweet dreams start here! Huge thanks to Beddys for sponsoring my ORC Spring 2024. Their comfy, eco-friendly kids' beds are a game-changer for bedtime (and morning!). Don't forget to use the limited time discount code BIRTHDAY20 to save on your purchase!
Welcome back to our journey through the One Room Challenge!
I’m Julie, and I’m diving into Week 5 of my first ever One Room Challenge (ORC), a thrilling, community-driven event that unites home design enthusiasts to transform a space over six weeks.
Unlike a competition, the ORC is all about camaraderie and shared experiences in the world of DIY and interior design.
This community-focused event is more than just a transformation; it's a celebration of creativity, collaboration, and personal growth.
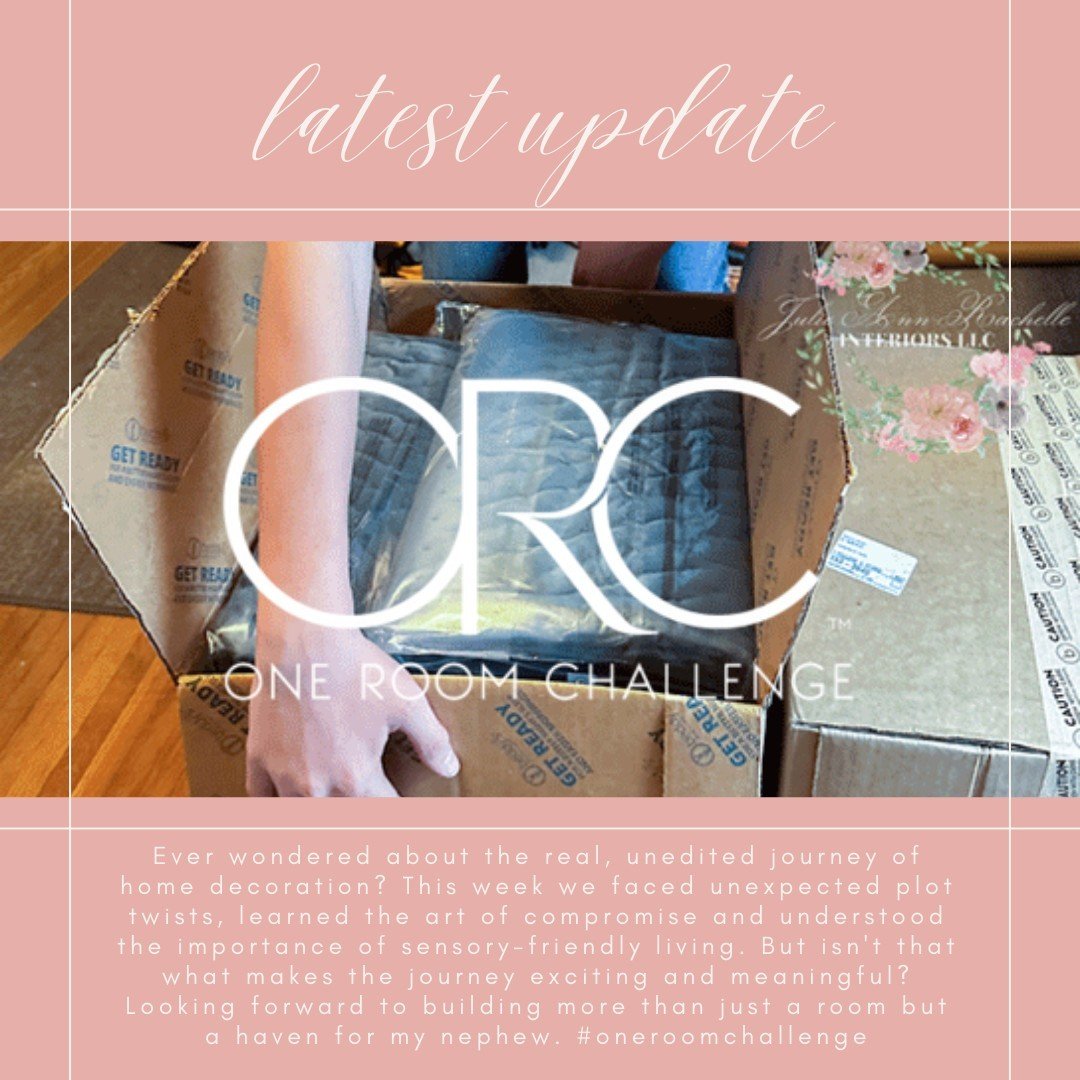
My thoughts about this week is that there was a mix of excitement and uncertainty.
The plan was to join forces with my sister to decorate and install new elements like the Govee Y Glide lights and Beddy’s bedding in my nephew’s bedroom, along with assembling a new dresser and decorating bookshelves.
However, life’s unexpected turns meant my sister and her son tackling the bedding without me this weekend, while I tried to come up with new options for the lighting design.
Decorating is postponed for now due to busy schedules. I’m scheduled to visit her home 90 miles away twice in May to help with the to-do list.
Also in the mix, my sister voiced concerns about the layering of decor possibly overwhelming her sensory-sensitive son—a reminder of the delicate balance between aesthetic appeal and functional living spaces for all family members. She’s more of a minimalist than I am, while I am worried that there might not be enough visual interest with her edits. I prefer a curated aesthetic.
Before I begin this week’s progress though, be sure to check out all the other fabulous ORC Spring 2024 participants’ amazing projects.
Looking for a brief recap of the previous weeks? Jump to here.
This article may contain commissioned links at no extra cost to you. More information in my sidebar.
Table of contents:
Focus #1: Unboxing the Fun Stuff from Our Sponsor Beddy’s!
Focus #2: Rethinking the Lighting Design
Focus #3: Navigating Furniture and Rug Revisions
Revisions’ Contributions to Room Dynamics
What's the trickiest part about the One Room Challenge?
How do you make a room both stylish and useful?
Q: Any advice for people new to the One Room Challenge?
Q: How do I pick lighting for someone with sensory sensitivities?
Q: Small bedroom, big dreams? How do I maximize the space?
Q: My kid loves gaming and sports. How can I incorporate their interests into the bedroom design?
Q: What if things don't go according to plan during a renovation?
Q: How can I get my kids involved in designing their own space?
Q: The project is taking longer than expected! How do I keep things on track?
Connect with me
I love connecting with you on social media! Whether you're leaving a comment below, sharing your thoughts on Instagram (@julie_ann_rachelle), or pinning your favorite design ideas on Pinterest, your interaction fuels our passion for creating beautiful and functional spaces.
Stay up-to-date on Logan's room makeover by following my blog posts at the Blended Decor Blog by subscribing and follow social media updates on your favorite social media platform.

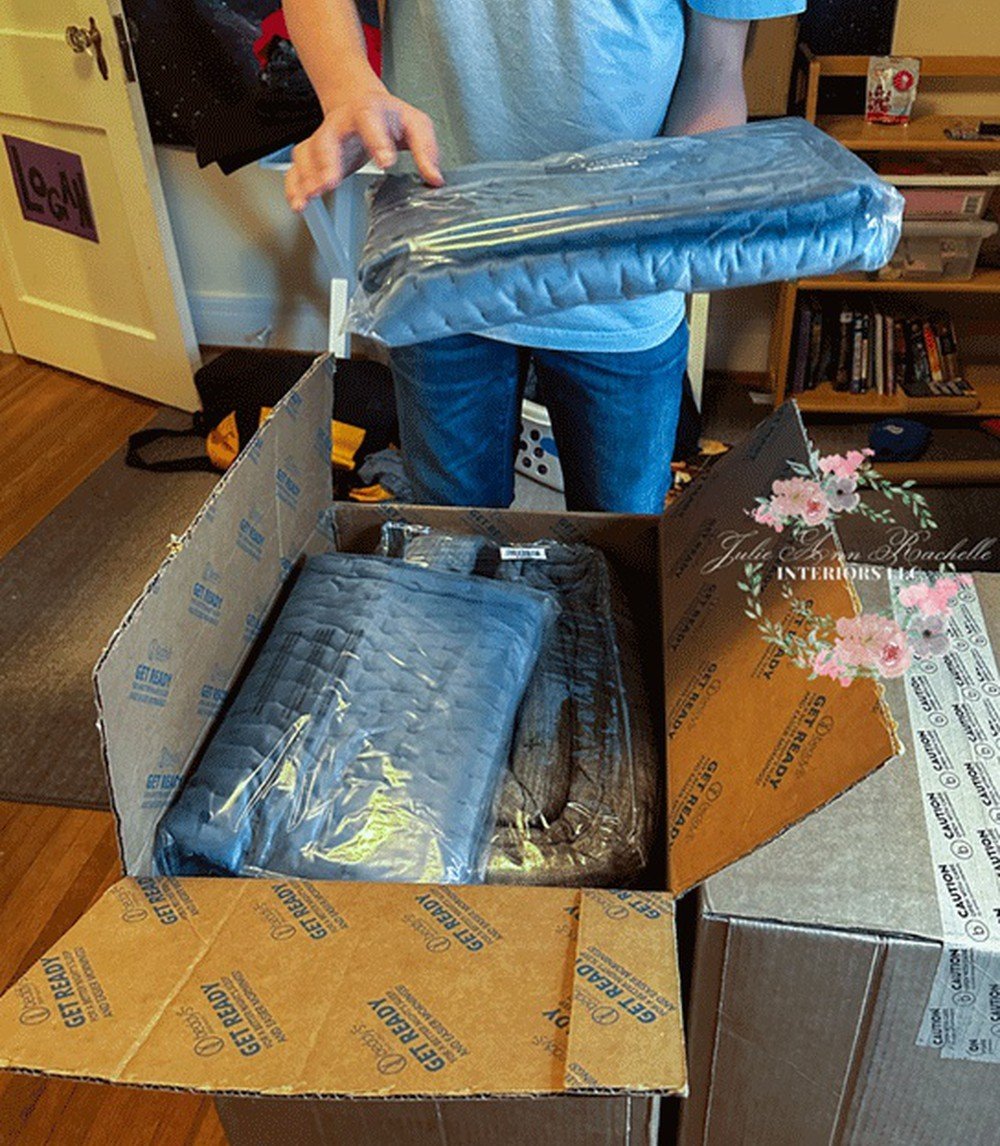
Focus #1:Unboxing the Fun Stuff From Our Sponsor Beddy’s! (with a videos and photos from my sis)
Unboxing Experience


Interview with Logan
1. Q: What was your first impression when I gave you the task of opening up the boxes and getting the Beddy’s bedding out?
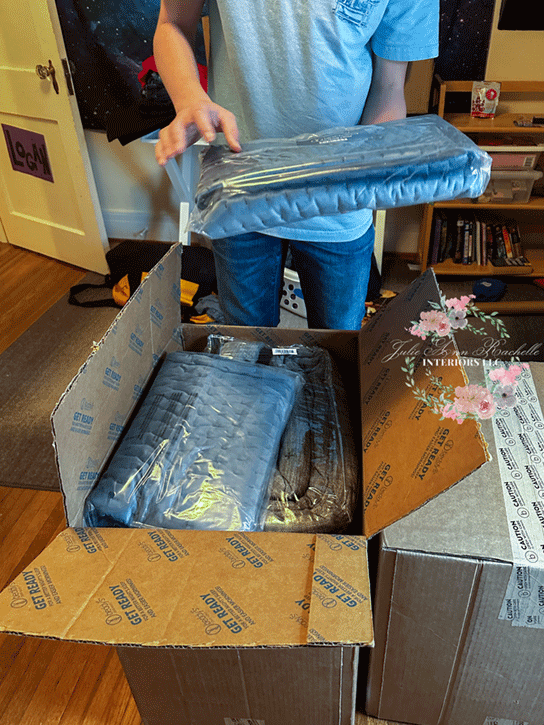
Logan: A: When I first opened it up and I saw the bedding I thought that it was just one big blanket. It was just gonna be, like, a normal bedding stuff.
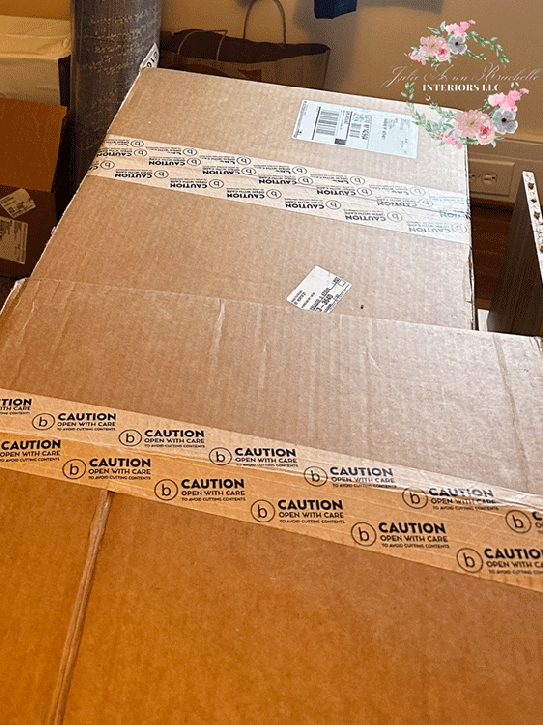
And then I opened it up out of the zipper bagging and stuff, and it was all packed really nicely and vacuum sealed.
So it was really easy for shipping and opening and stuff when you got home.
Well, when I first opened it up and I saw it, it was like a big zipper thing and there was no sheets and I don't like putting down sheets cause that's like really annoying, but it came as its own sheet and the bedding.
I thought that was really cool. And it's like its own little sleeping bag. I think it's really good and it really fits how I like to like sleep and stuff. So I thought that was pretty nice.
2. Q:What do you think about the pillows that came with it?
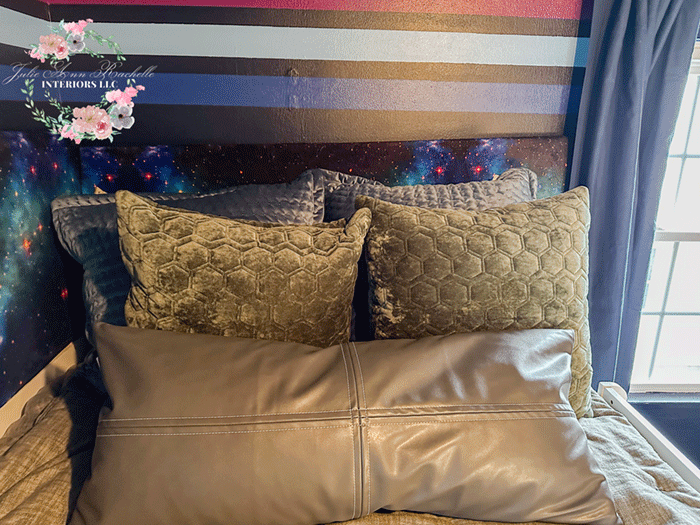
Logan: A:The pillows seem really comfortable. Cool. And I can't wait to try them out and the pillowcases look really good too, so.
Dana: QYeah. Well, tonight's your first night on the bedding, so you're excited about that, huh?
Logan: A:Mm hmm.
3. Dana: Yeah. What do you think you like most about it?
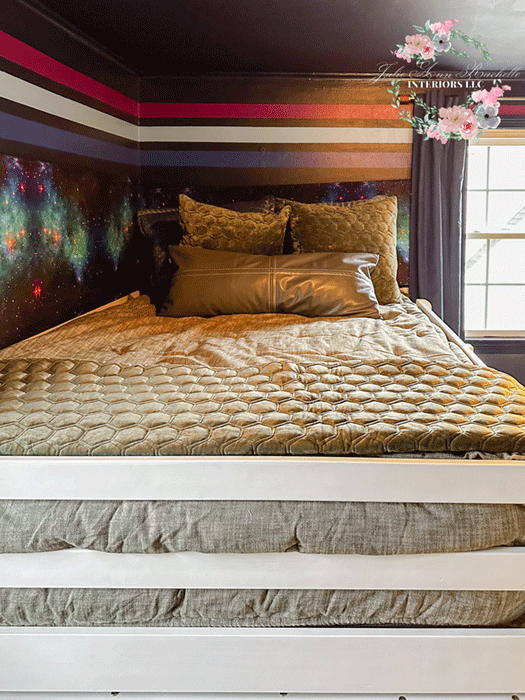
Logan: A:The fact that it's like its own zipping bag. It's really easy to make the bed as well.
Dana: Yeah, very easy to make that.
4. Dana: Do you like the color?
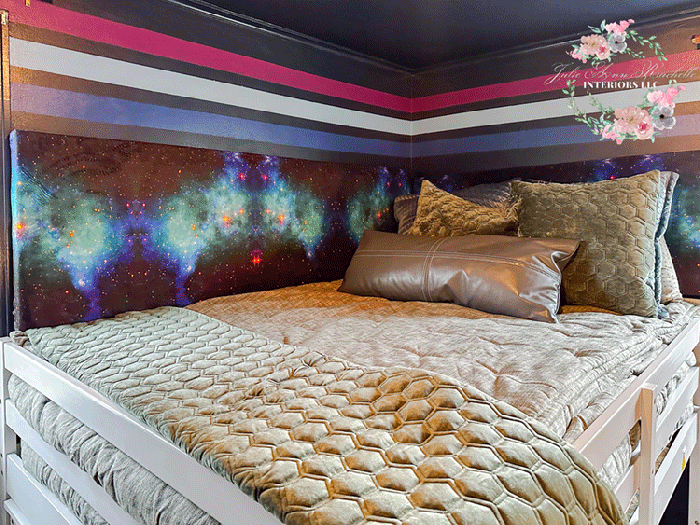
Logan: A:I do like the color. I think the color fits very nice with the paint on the walls and stuff.
“(The Beddy’s zippered bedding) was really easy to set up, but like, I just fell asleep right away. It was so comfortable.””
5. Dana: Yeah, what about the minky fabric On the pillows and like that's underneath. Yeah, like that fabric. kl
Logan: A: It's comfy stuff. Yeah, it's so warm and comfortable I could like I fell asleep when I first put it out for like three hours on accident.
I meant to finish putting it up. The second I got this thing down I laid down on it for a second to take a nap like inside of the sleeping bag thing fell straight asleep.
Yeah I was just trying to take like a five or ten minute break because I was doing things all day Setting it up. The actual bedding and stuff didn't take long.
I was just doing other things. It was really easy to set up, but like, I just fell asleep right away. It was so comfortable.

Step-by-Step Installation Guide
The Beddy's bedding system represents a significant innovation in home bedding, combining convenience and comfort in a unique zippered design.
Particularly suited for challenging spaces and for individuals with sensory sensitivities, Beddy's all-in-one bedding system can transform daily routines into effortless tasks.
This guide provides comprehensive, step-by-step instructions for installing Beddy's, making it an essential read for anyone looking to enhance their bedroom experience with functionality and style.
Before you begin the installation process, ensure that you have the correct size of the Beddy's bedding system for your mattress.
This will guarantee a perfect fit and optimal comfort. Clear the mattress of any existing bedding and position the mattress so that you have access to all sides.
Installing your Beddy's is as simple as fitting a fitted sheet but with the revolutionary functionality of a zipper.
This bedding system not only saves time and simplifies the process of making a bed, especially in tight spaces or for beds like bunk beds and RVs, but it also promotes independence in children, encouraging them to make their beds every morning with just a zip.
The unique design features of the Beddy's, such as the heavy-duty elastic, sewn-in sheets, and comfort panels, ensure that your bed remains tidy and comfortable all night long.
Whether for a child’s room, an adult’s bedroom, or a mobile sleeping space, Beddy's offers unparalleled convenience and comfort, making it an ideal choice for your bedding needs.
Unpacking Your Beddy's
Open the Package: Carefully remove the Beddy's bedding from its packaging to avoid damaging the zipper or the fabric.
Spread Out the Bedding: Lay the Beddy's flat on top of your mattress, ensuring that the zipper starts from the bottom end of the bed.
Fitting the Beddy's on Your Mattress
Align the Corners: Position the Beddy's so that the corners align with the mattress corners. The elastic edges should hug the underside of the mattress.
Secure the Elastic Base: Stretch the elastic base under each corner of the mattress. This heavy-duty elastic ensures the Beddy's stays firmly in place, accommodating mattresses of all sizes.
Zipping Up Your Beddy's
Start at the Bottom: Locate the zipper start at the bottom center of the bed.
Zip to the Top: Gently pull the zipper up to the sides towards the head of the bed, adjusting the top layer as you go to ensure it lays flat and even.
Check the Comfort Panels: Ensure the comfort panels made of cozy minky fabric are extending properly to cover the zippers, thus preventing any contact with the zipper during sleep.
Adjusting for Comfort
Detachable Top: If your model includes a detachable top, you can zip it off or attach it easily depending on your preference for coverage or ease of movement during sleep.
Smooth Out Wrinkles: Smooth out any wrinkles or bunches in the fabric to ensure a snug and comfortable fit.
Additional Features and Care
Using the ZipBase
If your Beddy's includes the all new ZipBase feature, enjoy the convenience of a removable bottom sheet. Simply zip off the sheet from the base and machine wash it when needed. The extra sheet included means you never have to wait for laundry, ensuring constant availability.
Maintenance and Care
Machine Washable: All components of the Beddy's are machine washable. Wash in cold water with mild detergent.
Tumble Dry: Use a low heat setting for drying to preserve the integrity of the fabric, especially the minky lining.
Article continued below…
Connect with me
I love connecting with you on social media! Whether you're leaving a comment below, sharing your thoughts on Instagram (@julie_ann_rachelle), or pinning your favorite design ideas on Pinterest, your interaction fuels our passion for creating beautiful and functional spaces.
Stay up-to-date on Logan's room makeover by following my blog posts at the Blended Decor Blog by subscribing and follow social media updates on your favorite social media platform.
Thoughts?
Let me know what you think of the new bedding from my sponsor Beddy’s in the comments! Do you think it will help keep Logan’s room cozy and tidy? What room in your home would a Beddy be perfect for?
Focus #2: Rethinking the Lighting Design
Exploring Lighting Configurations
Incorporating the right lighting in Logan’s room is crucial, given its potential to affect both the room's aesthetics and its sensory environment.
Originally, I planned to have the Govee Glide Y lights climb the wall and ceiling for a cool, futuristic vibe. I started to layout the design using provided templates as shown in the image below.
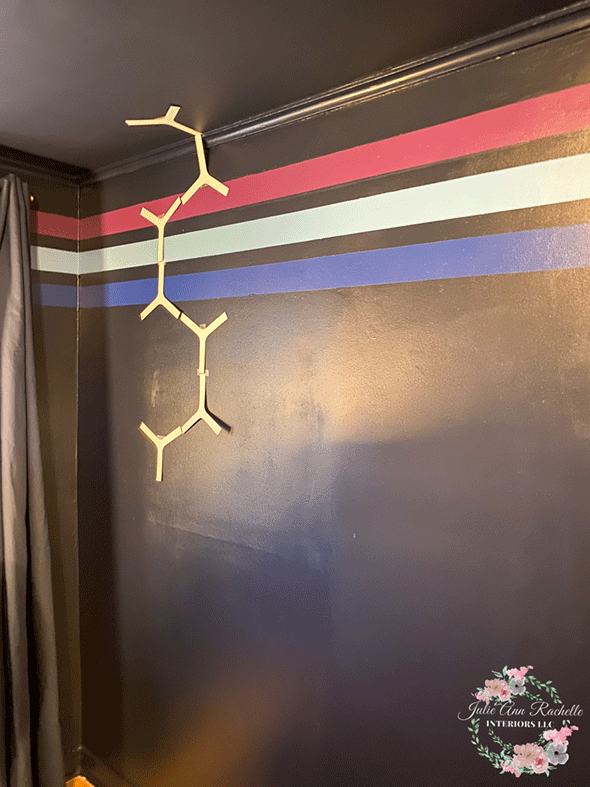
But as soon as my nephew Logan saw this, he said no to these lights climbing onto the ceiling.
Design Considerations and Adaptations
Responding to Logan’s feedback, I used 3D photorealistic software at home to visualize and refine the lighting placement further, ensuring it aligns with his preferences and the overall room design.
Three alternative lighting configurations were developed, each considering the presence of other elements like the small three-drawer dresser and the wall-mounted TV.
Challenges & Solutions:
Space: The room is small.
Visual clutter: The room already has striped paint near the ceiling, so we don't want the lighting to make it too busy.
New Lighting Ideas:
Linear Ascend: Lights run vertically along the dresser, adding height without going over the stripes.

Focused Glow: Lights just below the last stripe, and placed behind the TV creating a soft glow, reducing glare for gaming and relaxing.

Peripheral Placement: Lights run along the bottom of the wall, taking away visual clutter near the television.
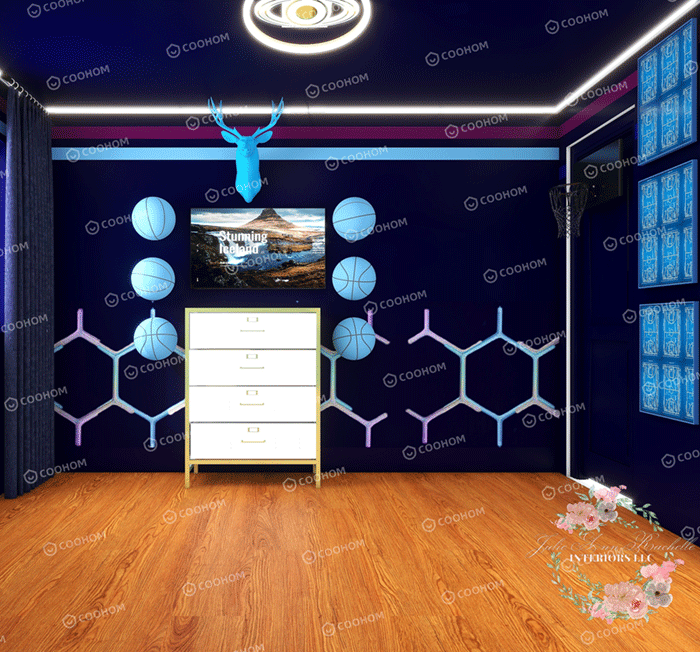
Each configuration is designed to maintain a sleek, modern look that Logan described as "futuristic," while being mindful of not overstimulating his sensory sensitivities.
Insights on Lighting's Impact
The impact of lighting on a room's atmosphere cannot be overstated, especially in a sensory-sensitive environment:
Mood Setting: Proper lighting can dramatically alter the mood of a room, making it feel more open and inviting or cozy and private, depending on the intensity and color of the light.
Functionality: In Logan’s case, lighting isn’t just decorative but functional, offering various settings that can adapt to different activities, from relaxing to gaming.
Sensory Adjustment: With the ability to change settings and react to music, these lights provide a sensory element that can be tailored to Logan’s needs, making the space truly his own.
Reflections
The choice of Govee Glide Y lights remains a central element in achieving the desired "futuristic" theme Logan is excited about.
The next steps involve presenting these configurations to my sister and Logan, ensuring the final setup is both aesthetically pleasing and comfortable for Logan's sensory needs. I’ve sent an email with these options to my sister, and I am awaiting feedback.
It’s crucial to continue this dialogue to ensure that the lighting not only meets but enhances the living experience in this personalized space.
Article continued below..
Thoughts?
Let me know what you think of the new lighting design options in the comments! Which design would you vote for?
Connect with me
I love connecting with you on social media! Whether you're leaving a comment below, sharing your thoughts on Instagram (@julie_ann_rachelle), or pinning your favorite design ideas on Pinterest, your interaction fuels our passion for creating beautiful and functional spaces.
Stay up-to-date on Logan's room makeover by following my blog posts at the Blended Decor Blog by subscribing and follow social media updates on your favorite social media platform.
Focus #3: Navigating Furniture & Rug Revisions
Adjusting Furnishing Choices
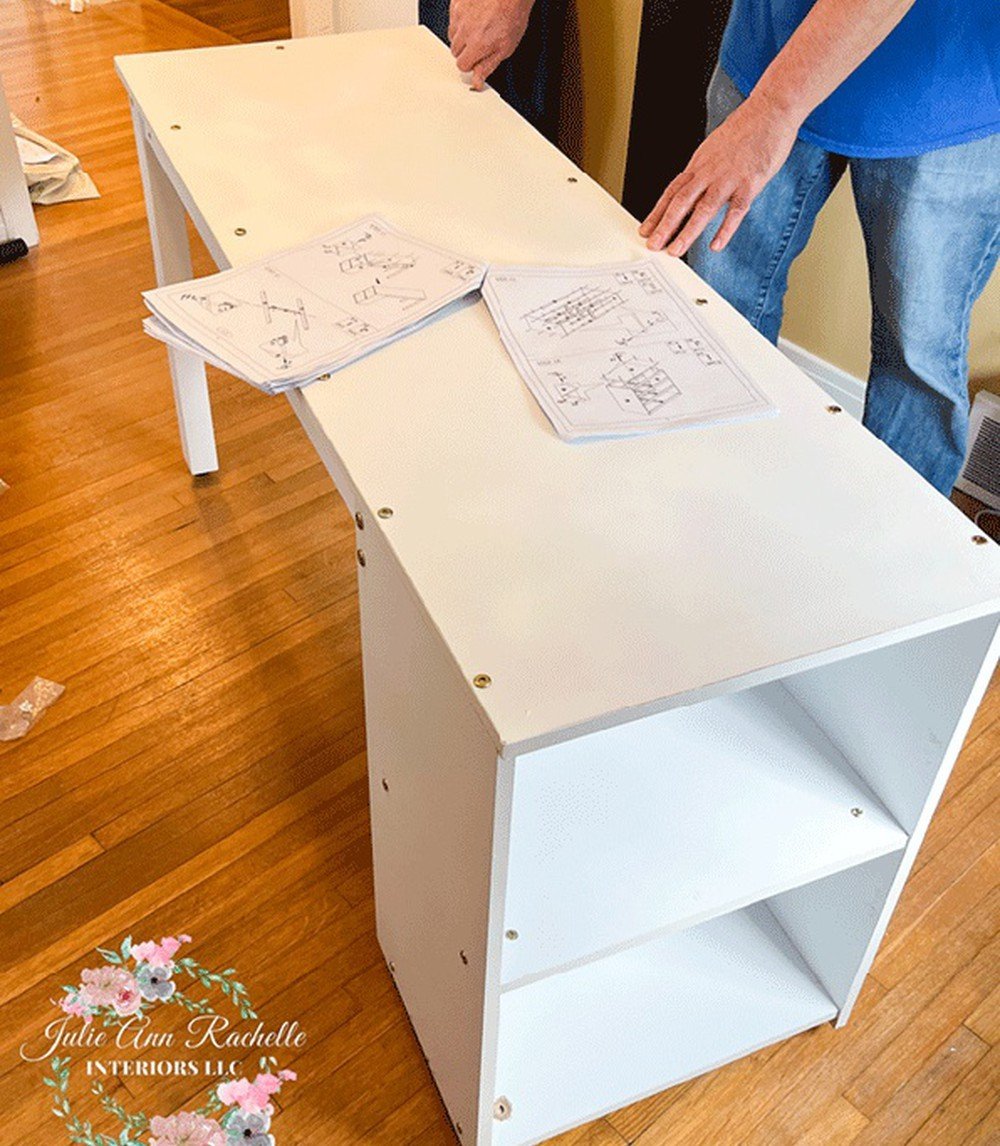
Sometimes, design plans need to adapt! The dresser I originally picked was perfect for the look, but it wouldn't arrive on time or fit the budget.
While it's often challenging to adapt a design vision to accommodate such changes, collaboration and compromise are key elements of a successful project.
We found several alternatives using DesignFiles, which, although initially these new alternatives seemed to disrupt the envisioned design, were within budget and available more promptly.
We agreed on a dresser that, while different, still supported the overall aesthetic and functional goals of the room.
Moreover, its height perfectly matches the existing setup, allowing for the TV to be placed above it just as it was previously.
This adjustment illustrates the importance of client involvement and respecting budget constraints, which can lead to satisfactory outcomes without compromising the overall design integrity.

Shop the look
Click on the image

If images do not appear between hear and “Shop the look,” please refresh the page.
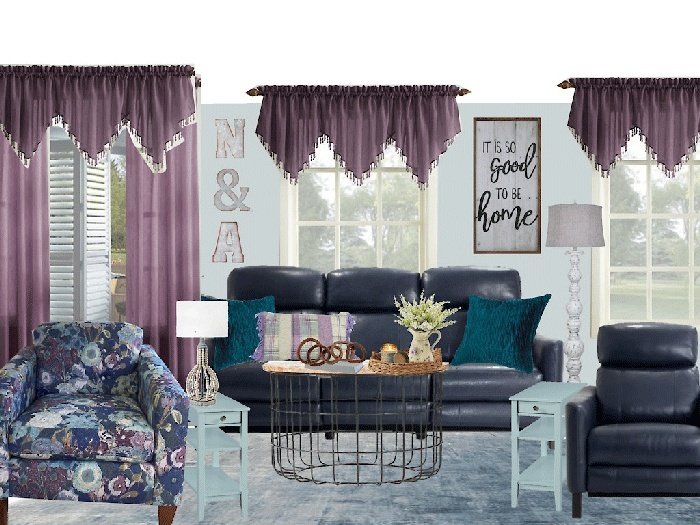
Rug Revamp
The selection of the rug size underwent a similar iterative process, driven by practical changes in the room's layout.
Originally, a 5x7 rug was chosen to fit neatly under the desk area, complementing the room's arrangement.
However, unforeseen changes in the placement of the loft bed’s ladder necessitated a shift in the desk's position, rendering the initial rug size impractical.
In a spontaneous decision at the end of a long day spent building the loft, I suggested a 5x5 rug, aligning with the width of the bed.
My mistake was in not taking the time to put it into the floorplan and the design before ordering it.
Initially, a smaller rug seemed sufficient, but upon reviewing photos of the rug in place, it became clear that it was not only visually awkward but also insufficient for creating a comfortable, grounding element in the room.
The smaller rug disrupted the room's harmony and could potentially contribute to a feeling of discomfort upon entering—an important consideration given Logan’s sensory sensitivities.
The room demands a larger rug, not just for aesthetic coherence but also to enhance the functionality of the space Logan now uses for building forts under the loft bed.
Selecting a Larger Rug
Considering the new uses of the space under the loft bed and the overall dynamics of the room, I now recommend opting for the largest rug that can fit in the room.
A larger rug will not only cover more of the floor area, providing a softer and more comfortable surface for Logan, while the starburst design will still be visible, contributing to the room’s visual appeal.
The rug size plays a crucial role in both the aesthetic and sensory experience of a room.
Article continued below…
Thoughts?
Let me know what you think of a larger size rug in the comments!
Connect with me
I love connecting with you on social media! Whether you're leaving a comment below, sharing your thoughts on Instagram (@julie_ann_rachelle), or pinning your favorite design ideas on Pinterest, your interaction fuels our passion for creating beautiful and functional spaces.
Stay up-to-date on Logan's room makeover by following my blog posts at the Blended Decor Blog by subscribing and follow social media updates on your favorite social media platform.
Revisions’ Contributions to Room Dynamics
These changes—opting for a different dresser and a larger rug—not only address immediate design and functional concerns but also have a longer-term impact on the room’s dynamics:
Functional Enhancements: The larger rug enhances the comfort and usability of the floor space, especially important in a sensory-sensitive environment like Logan’s.
Budget Management: Adapting the design to include more cost-effective furniture options ensures the project stays within budget without sacrificing style or functionality.
Visual and Physical Comfort: The right furniture and rug sizes contribute to a room’s overall comfort and flow.
By choosing a dresser that fits existing spatial and functional requirements and a rug that enhances comfort and cohesion, the room becomes more welcoming and easier to navigate.
Adaptability and Sensory Suitability: Making adjustments based on the availability of products and sensory needs underscores the adaptability necessary in interior design, especially in personalized spaces.
These decisions ensure that the room remains a suitable sanctuary for Logan, accommodating his activities and sensory preferences.
As we continue to refine the elements within Logan’s room, these thoughtful considerations in response to both anticipated and unforeseen challenges highlight our commitment to creating a space that is not only visually appealing but also deeply attuned to his needs.
Final Preparations and Managing Timelines
Reflecting on Progress and Upcoming Tasks
As we near the conclusion of the One Room Challenge, it's crucial to assess the progress made and plan meticulously for the remaining tasks.
The concern about coordinating schedules is valid, especially given the busy lifestyles involved.
This calls for strategic planning and possibly leveraging any available weekdays or partial days to ensure that the project doesn't disrupt the my sister’s household peace and still meets the deadline.
Detailed To-Do List and Strategies
These are items left to accomplish in our makeover of Logan’s room.
1. Painting:
Finish painting the door and closet doors.
2. Closet Door Mechanism:
Inspect and repair the glide system of the closet doors.
This is essential not only for aesthetic reasons but also for functionality, ensuring that the doors operate smoothly without scraping.
3. Headboards and Bed Arrangements:
Hang the headboards to create a daybed setup.
This will enhance the usability of the space, making it ideal for lounging during the day.
Make the low loft bed underneath area inviting for use as a fort or friend sleeping area.
Include the bean bag chair, possibly hang LED rope lights for ambiance, and ensure the area is cozy and appealing.
4. Lighting Installations:
Install the ceiling light and the Govee Glide Y lights.
These are crucial elements that will finalize the room's ambiance.
5. Building and Organizing Furniture:
Build the new dresser and organize the closet.
These are significant undertakings that will require focused efforts, making the storage areas functional and tidy.
Order a larger rug and arrange for the return of the smaller one.
This will ensure the room feels balanced and fully cohesive in design.
6. Decorative and Functional Touches:
Decorate the bookshelves and move Logan’s clothes in.
These finishing touches will help in visualizing the complete setup and are essential for the final reveal.
7. Planning the Big Reveal:
Organize a big reveal video to capture family reactions.
We’ll plan this for a day when most family members are available.
Article continued below…
Thoughts?
Let me know what you think of our to-do list in the comments! Do you think we’ll get it all done in time by the end of the One Room Challenge in 3 weeks?
Connect with me
I love connecting with you on social media! Whether you're leaving a comment below, sharing your thoughts on Instagram (@julie_ann_rachelle), or pinning your favorite design ideas on Pinterest, your interaction fuels our passion for creating beautiful and functional spaces.
Stay up-to-date on Logan's room makeover by following my blog posts at the Blended Decor Blog by subscribing and follow social media updates on your favorite social media platform.
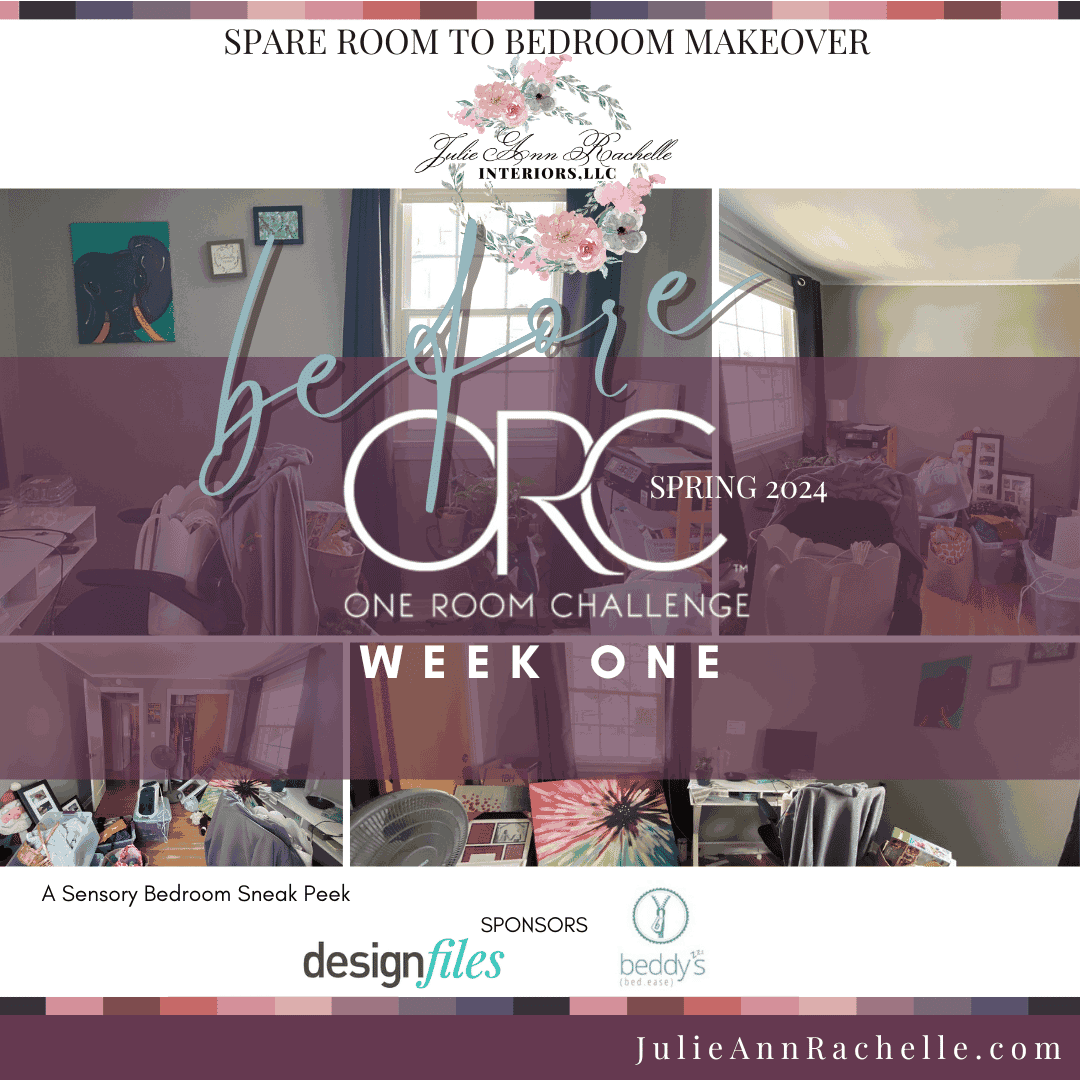
Recap of Weeks 1-4
We started by creating a design that's functional and comfortable for Logan, who experiences sensory processing sensitivity. We also tackled some challenges in Week 4, which ultimately led to a more inclusive design process.
Here's a quick look back at the previous weeks:
Week 1: Introduced Logan, the inspiration, and the importance of sensory-friendly design.
Week 2: Unveiled the room's design concept with a cool video of the striped painting process. We also gave a shoutout to DesignFiles.co for the design tools they provided.
Week 3: Shared valuable painting tips from ORC veterans and showed the amazing progress on painting the room.
Week 4: Hit a major milestone with the construction of the loft bed, desk, and drawers! We also introduced the soft and sensory-friendly minky fabric for the headboards. Plus, we dove into the decision-making process for the Govee Y Glide lights and Beddy's bedding, focusing on both functionality and sensory comfort for Logan's space. We also learned to embrace the unexpected and adapt to new situations, like some challenges we faced with the loft bed placement, fabric choice for the headboards, and extended construction time.
FAQs
Q: What's the trickiest part about the One Room Challenge?
A: The biggest challenge can be finding the sweet spot between your dream design and real-life stuff like budget and how the space actually needs to function. It's all about compromise, but that can still lead to an amazing outcome!
Q: How do you make a room both stylish and useful?
A: The key is to listen! Think about who will be using the space and what their needs are. Then, design a room that incorporates those needs while still looking awesome.
Q: Any advice for people new to the One Room Challenge?
A: Plan ahead as much as you can, but be prepared to bend a little if you need to. Being flexible and creative will help you overcome any obstacles that pop up along the way.
I also tried to have my blog and social media posts ready before midnight on Tuesdays, so I could post on Wednesday at 12 am on the ORC blog.
Q: How do I pick lighting for someone with sensory sensitivities?
A: This is a great question, and there's no one-size-fits-all answer. It's important to consider the individual's specific sensitivities.
In general, look for lights that offer adjustable settings for brightness and color temperature.
That way, you can create a calming environment or a more energizing one, depending on the situation.
Q: Small bedroom, big dreams? How do I maximize the space?
A: Smart furniture choices are key! Think about furniture that serves multiple purposes, like ottomans with storage or beds with built-in drawers.
Also, consider using lighter paint colors and keeping furniture low to the ground – this can make the room feel bigger and brighter.
Q: My kid loves gaming and sports. How can I incorporate their interests into the bedroom design?
A: Fun accents are your friend! Think posters, throw pillows, or even a rug with their favorite team's logo. You can also incorporate their hobbies into the furniture – a desk with plenty of surface area for gaming or a comfy reading nook for catching up on sports news.
Q: What if things don't go according to plan during a renovation?
A: Don't panic! Unexpected challenges are pretty common. The key is to take a deep breath, assess the situation, and come up with a creative solution. Sometimes, these unexpected turns can lead to even better ideas!
Q: How can I get my kids involved in designing their own space?
A: Let them be part of the process! Show them different design options and get their feedback on colors, furniture, and decorations. Even young children can have great ideas, and involving them will make them feel more invested in the finished space.
Q: The project is taking longer than expected! How do I keep things on track?
A: It happens! The best way to manage extended project times is to be realistic about deadlines and set achievable goals. Break down the project into smaller tasks and focus on completing one step at a time. Don't sacrifice quality for speed – a well-done project is worth the wait!
Article continued below..
Thoughts?
Ask me a question about this week in the comments! Have any suggestions? I’d love to hear them!
Connect with me
I love connecting with you on social media! Whether you're leaving a comment below, sharing your thoughts on Instagram (@julie_ann_rachelle), or pinning your favorite design ideas on Pinterest, your interaction fuels our passion for creating beautiful and functional spaces.
Stay up-to-date on Logan's room makeover by following my blog posts at the Blended Decor Blog by subscribing and follow social media updates on your favorite social media platform.
Conclusion
Week 5 of the One Room Challenge is done and let me tell you, it's been a rollercoaster!
We totally hit some bumps in the road this week, but guess what? We're still rolling!
1.Super Cool Lights on Hold
We planned these awesome Govee Glide Y lights that climb on the walls and stuff, but Logan wasn't feeling it.
So we gotta brainstorm new ideas to make the room look futuristic, but not overwhelm his senses.
We might put the lights somewhere else, we're still figuring it out!
No worries, they’re going to be epic!
2.Furniture Shuffle
The dresser I picked wasn't gonna work out, so we found a different one that's just as cool and fits the budget.
Same goes with the rug. We had to switch to a bigger one because the first one, well, let's just say it looked like a tiny island in a sea of floor. Not cool!
The new rug will be comfy for Logan to play on and tie the whole room together.
3.Working Around Busy Schedules
My sis and I are swamped, so getting everything done on time might be a bit of a challenge.
But we're tag-teaming it and trying to squeeze in work whenever we can. We don't wanna disappoint Logan, right?
4.The Fun Stuff!
We did get some things done though! My sis and her son already put together the new bedding, and it looks amazing.
Plus, the loft bed is built, which is pretty darn cool.
5.What's Next?
We gotta paint the door and closet doors, hang some headboards to make a comfy daybed, and install those awesome lights (hopefully we figure out a new spot they like!).
We'll also build the dresser and organize the closet – gotta make that space super functional!
And of course, there's decorating the shelves and filming the big reveal, which is going to be killer!
6.Stay Tuned!
Listen, things don't always go exactly according to plan, but that's okay!
We learned a bunch this week about being flexible and creative, and that's what makes the One Room Challenge so awesome.
We're still on track to finish Logan's room by the deadline, and it's gonna be even better because of these little changes we made along the way.
Wish us luck on fitting everything in before the deadline!
Stay tuned next week for more updates! We've got a ton to do, from painting to installing lights, and you know we'll share all the fun (and maybe some fails) with you.
And hey, if you're thinking about doing your own room makeover, don't be scared! Just be flexible, have fun, and embrace the unexpected – it might just make your project even cooler!
Week One: April 3
Week Two: April 10
Week Three: April 17
Week Four: April 24
Week Five: May 1
Week Six: May 8
Week Seven: May 15
Week Eight: May 22 The Big Reveal! Let’s party!!!
7.Share your thoughts!
We’re excited to continue making progress on Logan’s room and can’t wait to reveal the more progress photos and updates!
In the meantime, let us know in the comments what you think of the all the changes and the Beddy’s bedding!
I love connecting with you on social media! Whether you're leaving a comment below, sharing your thoughts on Instagram (@julie_ann_rachelle), or pinning your favorite design ideas on Pinterest, your interaction fuels our passion for creating beautiful and functional spaces.
Stay up-to-date on Logan's room makeover by following my blog posts at the Blended Decor Blog by subscribing and follow social media updates on Instagram.
See you next week for another exciting installment of Logan's futuristic sensory escape!
Catch up on recent posts on the Blended Decor Blog by Julie Ann Rachelle Interiors LLC


Your comments mean the world to me!


Affiliate Disclosure Policy
Copyright Act of 1976 Section 107 Fair Use Disclaimer
These Articles Are Going Viral


Fresh Instagram Posts


Building a new dresser with my nephew Logan was a heartwarming adventure on week seven of the #OneRoomChallenge! While there were a few laughs, seeing the finished piece and that special hug at the end made it all worthwhile. This project is about so much more than design – it's about creating a space that works for Logan and building lasting memories together.