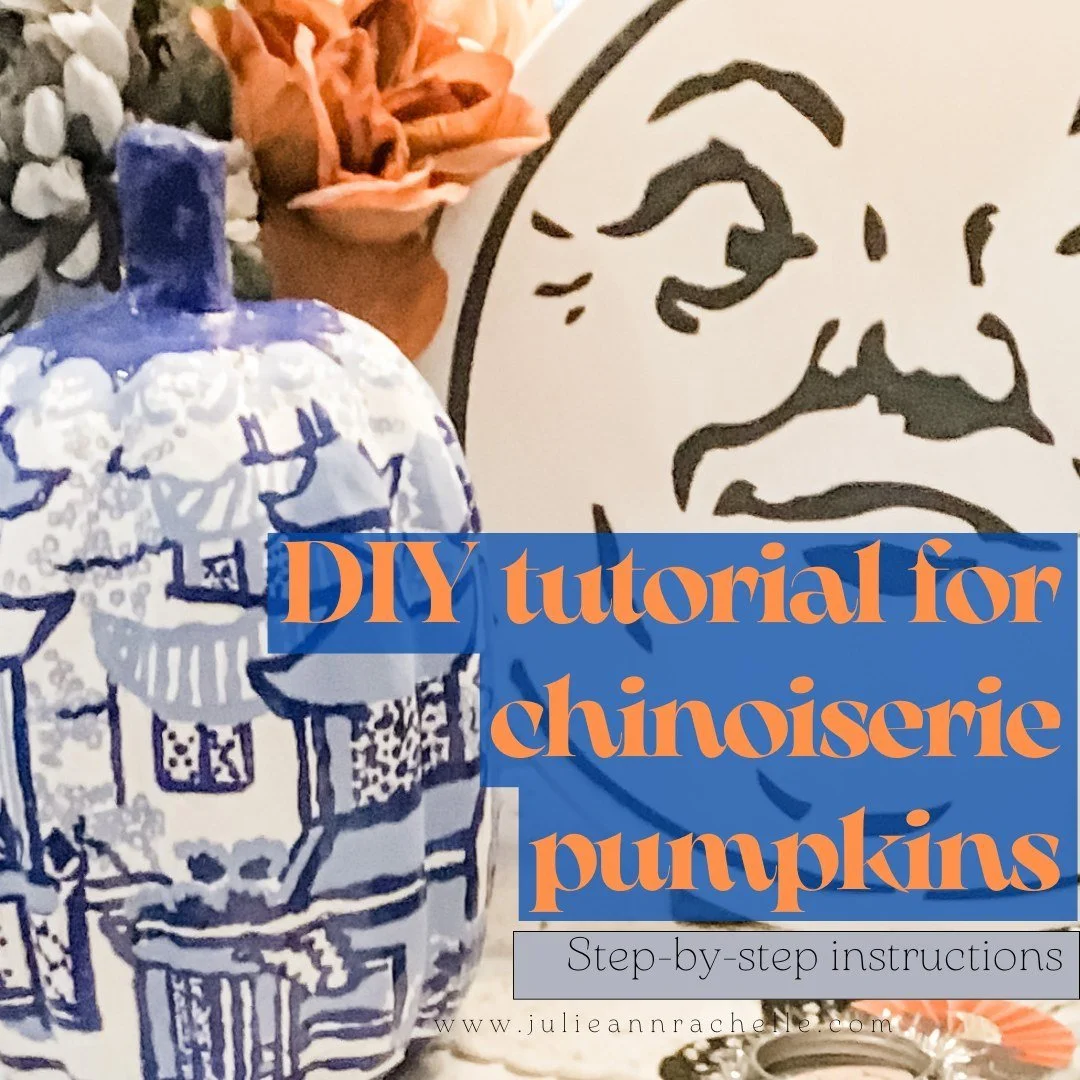
DIY Chinoiserie Pumpkins: A Fun and Easy Fall Decor Project


Updated 8/15/2023
Craving a unique twist to your home decorations this autumn?
Experience the rapidly rising trend of Chinoiserie pumpkins.
Labeled as 'Chinese-esque', this French-inspired style merges quintessential Chinese motifs such as dragons and lions with Western artistry, architecture, and furniture.
Among this eclectic mix of decor, Chinoiserie pumpkins have gained substantial love from interior designers and craft enthusiasts, serving as the perfect seasonal statement piece around the house.
Struggling to find one?
I searched for an impressive assortment of pre-painted pumpkins at the bottom of this article, or, for the crafty ones, I offer a step-by-step painting demo to create your personal Chinoiserie pumpkin.
Uncover the secret to locating these pumpkins for sale and painting your own, transforming your home into a unique autumn paradise.
Table of Contents:

You will also enjoy these related posts:
Chinoiserie Pumpkin Painting Demo
Click on image to view video tutorial or see the step-by-step instructions below.
Supplies:
These items are similar to those shown in the video (commissioned links: I may receive a small commission at no extra cost to you.)
Choose from:
Alternative to individual paints: 16 Color Matte Acrylic Paint Value Pack by Craft Smart®
Paint palette (or use an old plate as I did…just be sure to wash it off before the paint hardens)
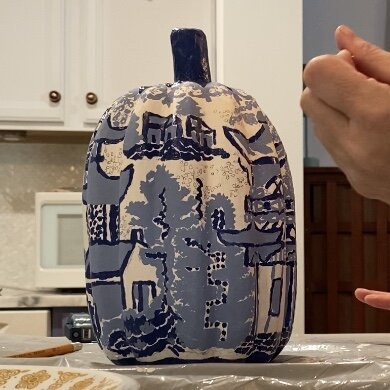
Step by Step Photographed Tutorial - Let’s make chinoiserie pumpkins together!!
Please read all the instructions before beginning!
Lay down newspapers or a protective surface, using a reclaimed plastic trash bag, if desired.
Apply multiple coats of white craft paint to the papier-mâché pumpkin using a foam brush. Allow each coat to dry before applying the next.
DIY Tips
Take your crafty decorating skills up a notch with my tips for making awesome chinoiserie pumpkins!
For an extra touch, remove the stem and replace it with a real pumpkin stem.
Layer three coats of white acrylic paint, allowing each coat to dry before applying the next.
To keep your paint palette from drying out, cover it between coats.
Select two shades of blue to paint the pattern, using a foam brush to apply the white paint and detailed brushes for the design.
Paint top to bottom and from left to right if you’re right-handed, or right to left if you’re left-handed. Once your paint is dry, use a white latex eraser to remove any pencil lines.
To finish off, spray with an acrylic sealer spray. Look to our chinoiserie pumpkin finds for inspiration and don’t forget to cover your surface with newspapers or recycled plastic trash bags to avoid paint stains! Have fun and enjoy the process!


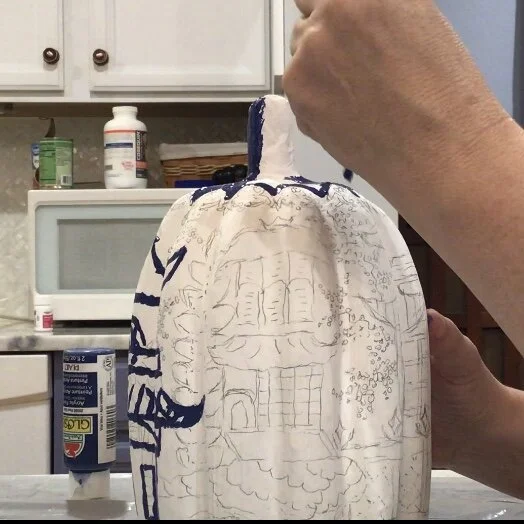
3. Once the pumpkin has dried overnight, use a pencil to draw the desired pattern. Add as much or as little detail as you prefer, following the inspiration from Schumacher's Nanjing Porcelain pattern.


Related Blog Posts:
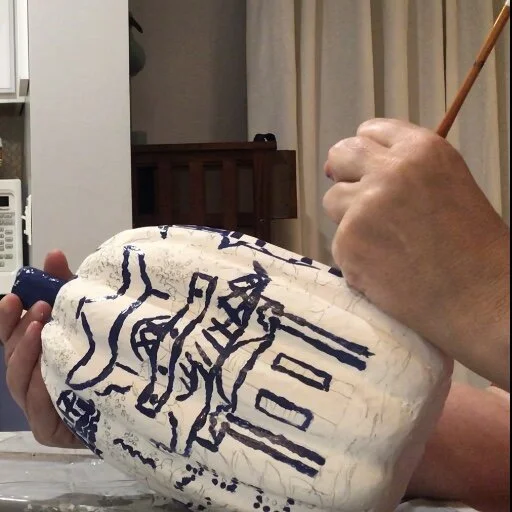
4. Paint the dark blue outlines according to your pencil drawing. Paint in a top-to-bottom and left-to-right direction (or right-to-left for left-handers).


Take breaks as needed to enjoy the process.


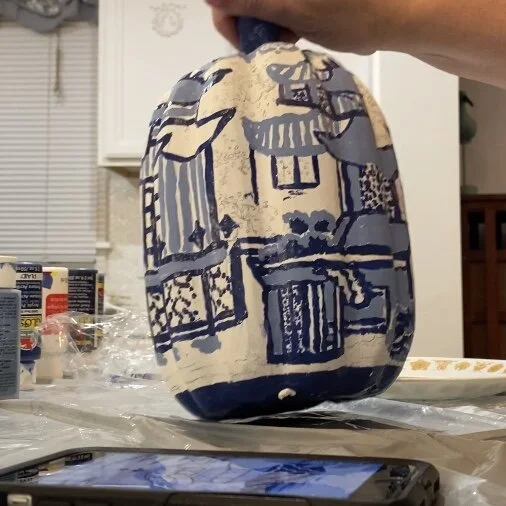
5. Optionally, add a decorative border along the top and bottom for an appealing visual touch. The border can be simple or intricate.
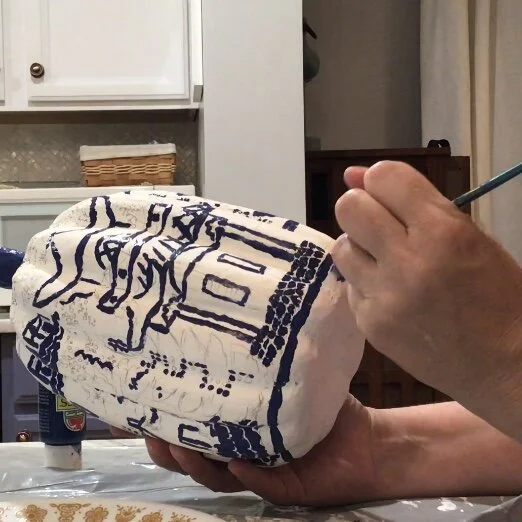

6. Begin filling in areas and creating patterns using the lighter blue paint. Refer to your inspiration pattern. Allow sections to dry before proceeding to avoid smudging wet paint.


If your detail brush is too large for tiny elements, consider using a toothpick for finer details like small circles. If time is limited, you can omit intricate details.


Enhance your chinoiserie pumpkin with various creative ideas, such as:
Pairing it with other fall décor items for a wonderful hostess gift.
Adding a blush-colored ribbon for an extra touch.
Decorating it with dried artichokes and white pumpkins.
Removing the top of the pumpkin and adding succulents.
Displaying it at each place setting for a unique touch.
Your blue and white chinoiserie pumpkins are sure to leave a lasting impression!
Here are some additional tips for creating a chinoiserie pumpkin:
Use a fine-tipped brush for the details.
Allow plenty of time for the paint to dry between coats.
Be patient and take your time. This is a fun project, so enjoy the process!
Get creative and experiment with different patterns and colors.
Love this look but lacking crafty skills or time? Shop my Blue and White Chinoiserie Pumpkin favorites to add elegance to your fall decor.
Chinoiserie Pumpkin Finds
commissioned links

For more fall seasonal decorating ideas, explore these articles:


Reader Favorites


A quick bit of business: Whenever I recommend or link to products and services on this page, I may (and probably do) receive affiliate commissions on purchases, at the same price as advertised. The opinions I express are my own, but they are honest, and I do my part to recommend products I I have found to be valuable and credible. I will be happy to answer any questions you may have. Feel free to contact me using the contact form via the menu, or read my affiliate disclosure statement and my terms + conditions page here. You’ll brighten my day with your support! Thank you.